
Using the Configurator in FootID Pro, Part 9
-

Hopefully, by now, those of you reading this have become quite familiar with using the FootID Pro application on your phone and your computer, and are taking advantage of all it has to offer the busy practitioner. If not, let’s quickly review some basics, and then move on to where we left off within the “Configurator”. The home page of the app has several options for starting your new orthotic order. You can select either “New Order”, “Orders”, “Patients”, or the large orange “Start Building your Orthotic” button and easily find a way to start entering information on a new order. Next you can select a new or existing patient (previously entered using the app), or you can bypass this step and go directly to the configurator. Should you choose to enter the patient information at this point, you can then select what type of foot model you wish to use. Once that is done, you start to build the orthotic device using the configurator. This process can be as simple as one or two clicks, or as intricate and specific as you desire. One of three basic models may be selected and customized or not, or you may select any of our sport or pathology based models, or any previous templates you have created in the past. Once you are within the configurator you can proceed to further customize either by using the box on the left of the screen and selecting any of the blue lettered options, or you can scroll vertically or horizontally through the various options of your orthotic build.
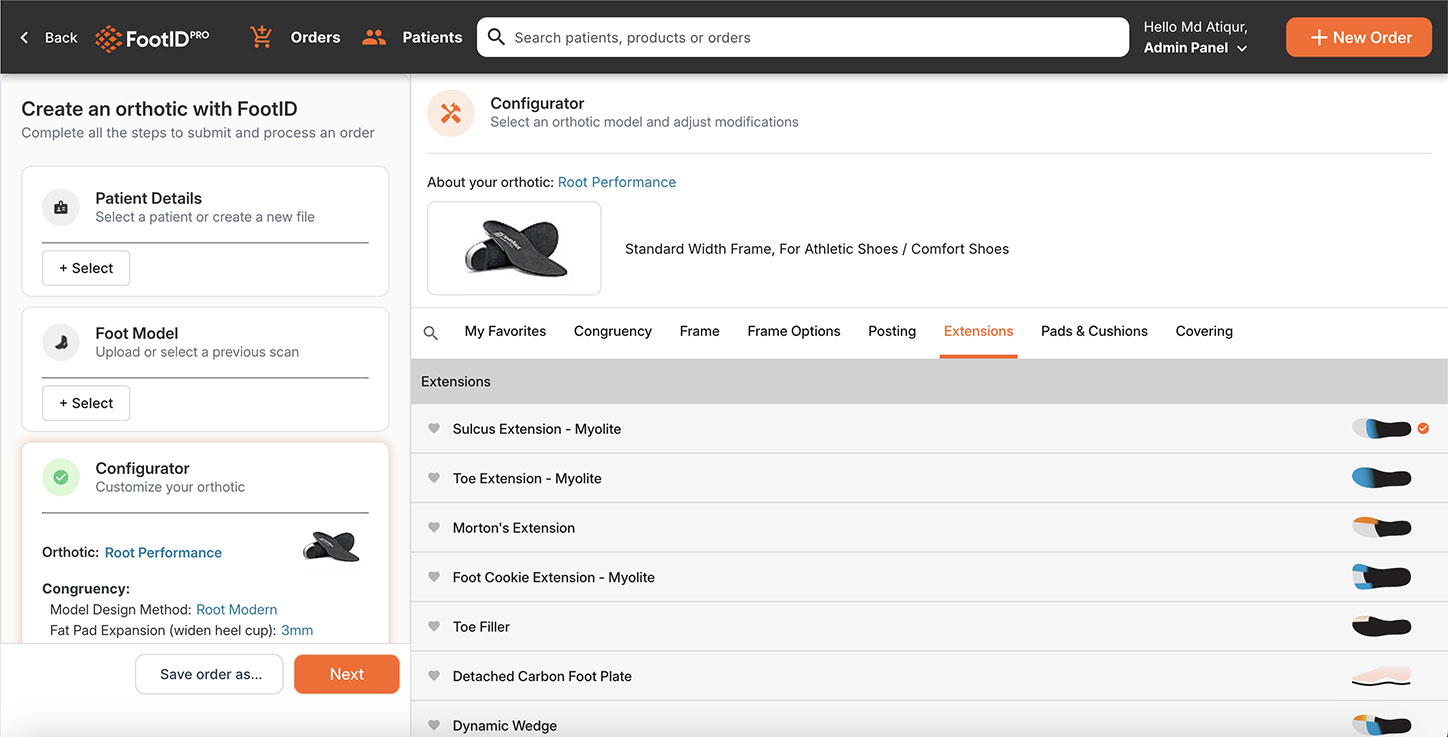
Scrolling horizontally across the options within the configurator, we now find ourselves in the sixth column of options, “Extensions”. The first two fields in this column pertain to the length of the extension, either “Sulcus Extension-Myolite”, which extends the orthotic to just posterior to where the toes are, and “Toe Extension-Myolite”, which should extend to the entire toe box area of the shoe. The second option is sometimes referred to as a full extension.
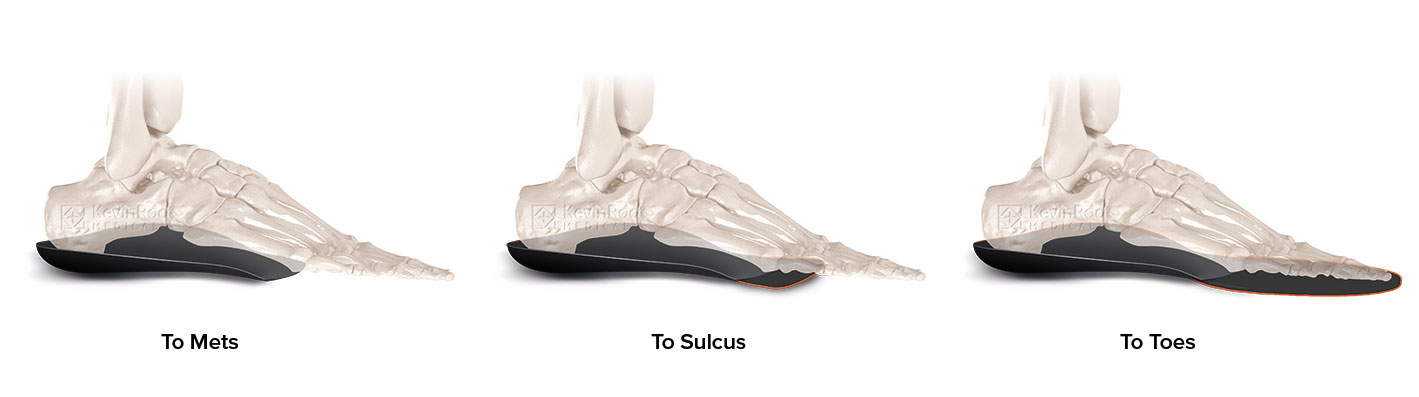
Should you prefer to not have an extension on the orthotic at all, I would recommend choosing a model that is standard length such as the “Classic Sport”. Myolite is the preferred material to use as the cushion of the extension but you may use other materials instead by noting as an addendum to your order. Various thicknesses are available for the extension, 3 mm being the standard for most models and most commonly used.
The next field in the extensions column is “Morton’s Extension". The Morton’s Extension is used generally to protect or accommodate an arthritic or otherwise limited motion 1st MTPJ. Extra padding or rigidity is extended only under the 1st MTPJ and Hallux. A Reverse Morton’s Extension is just the opposite, the extra padding is removed under the 1st MTPJ to facilitate plantarflexion of the first ray and enhance 1st MTPJ range of motion. Generally speaking, a Morton’s Extension is used in moderate to severe cases, and a Reverse Morton’s may be indicated in a milder case of 1st MTPJ pathology. This field includes the chain link icon to differentiate left and right foot options as well as toggles to select the length of the extension. Skiving the Morton’s Extension avoids a drop off between the first and second rays which can be irritating to some patients, especially if they also have a second toe crossover. Options for thickness of the extension are also available here.
“Foot Cookie Extension-Myolite” is an option whereby the padding is removed under the three central metatarsal heads but remains under the first and 5th metatarsals. This may be helpful in offloading one or more of the central metatarsal heads, in a case of metatarsalgia, elongated, hypertrophic or plantarflexed metatarsal or Freiberg’s infraction.
“Toe Filler” is available for one or more toes or rays that have been amputated. The chain link icon is here to allow you to specify which toes on which foot require being buttressed or filled on on the device. I would recommend submission of as much supporting documentation as possible to insure accuracy as to how much filler you will need. Shoe information is also helpful to avoid inaccuracy in the length of the filler.
“Detached Carbon Foot Plate” is a separate flat plate that is placed under the orthotic device and serves as an extra protection for severely arthritic or injured feet or other situations when some immobilization is indicated. It comes in two levels of rigidity.
“Dynamic Wedge” is an extension used to encourage dorsiflexion of the great toe. It is a combination of a Reverse Morton’s Extension with material removed under the first metatarsal head, and an extensory wedge added under the great toe. It is primarily used in Hallux Limitus, but can be helpful in cases of painful calluses of the great toe. It can be used unilaterally or bilaterally and can vary in thickness as desired.
“Met wedge” is a varus wedging of the myolite extension, and serves somewhat as a distal extension of the forefoot post to under the metatarsal heads. It is available from two degrees to six degrees. It can be quite beneficial to severely overpronated patients, and also useful in situations in which the patient is up on the ball of the foot a lot and needs some forefoot correction, such as a sprinter or tennis player.
As you can see, many options are available when adding a distal extension to the custom foot orthotic device. Next, we will continue this journey when we start to discuss the next column in the “Configurator”, namely “Pads and Cushions”.